
As a marketplace operator, you have the option of assigning sales areas to the lead acceptors of your marketplace. You can do this manually or via an integrated import function.
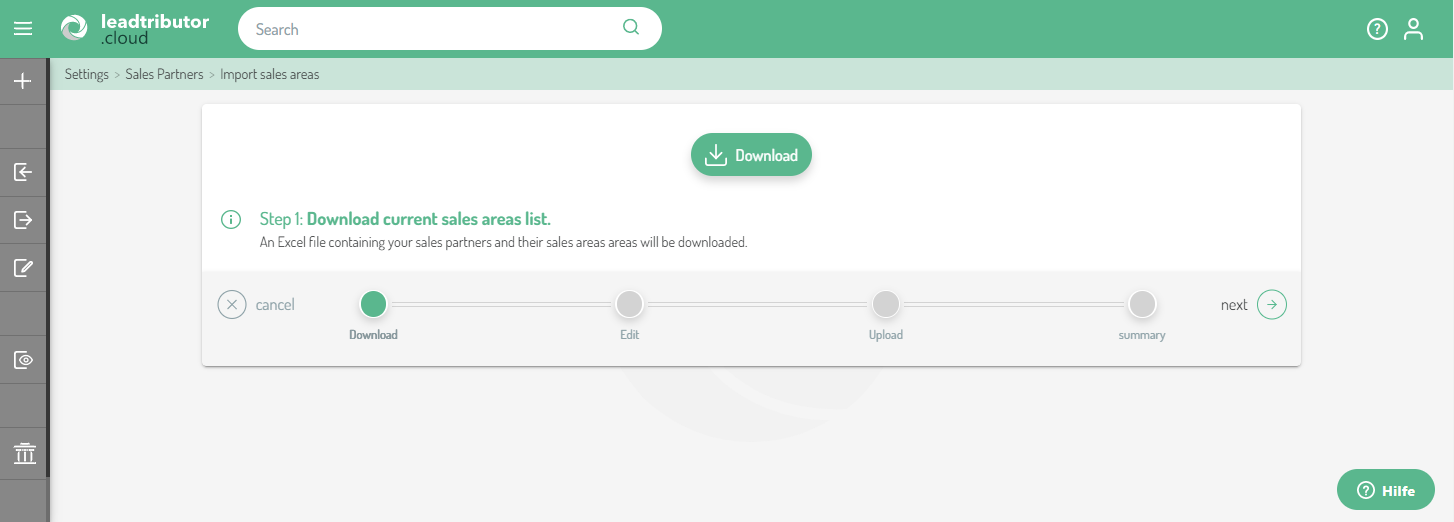
To use the import function, click settings, Sales partners and Import sales area:

You will now be guided through the process in 3 steps:
Step 1: Download the current sales areas
First, click Download and download an Excel file that lists all your sales partners:
If the individual sales partners are already assigned zip code areas, these are already prefilled:
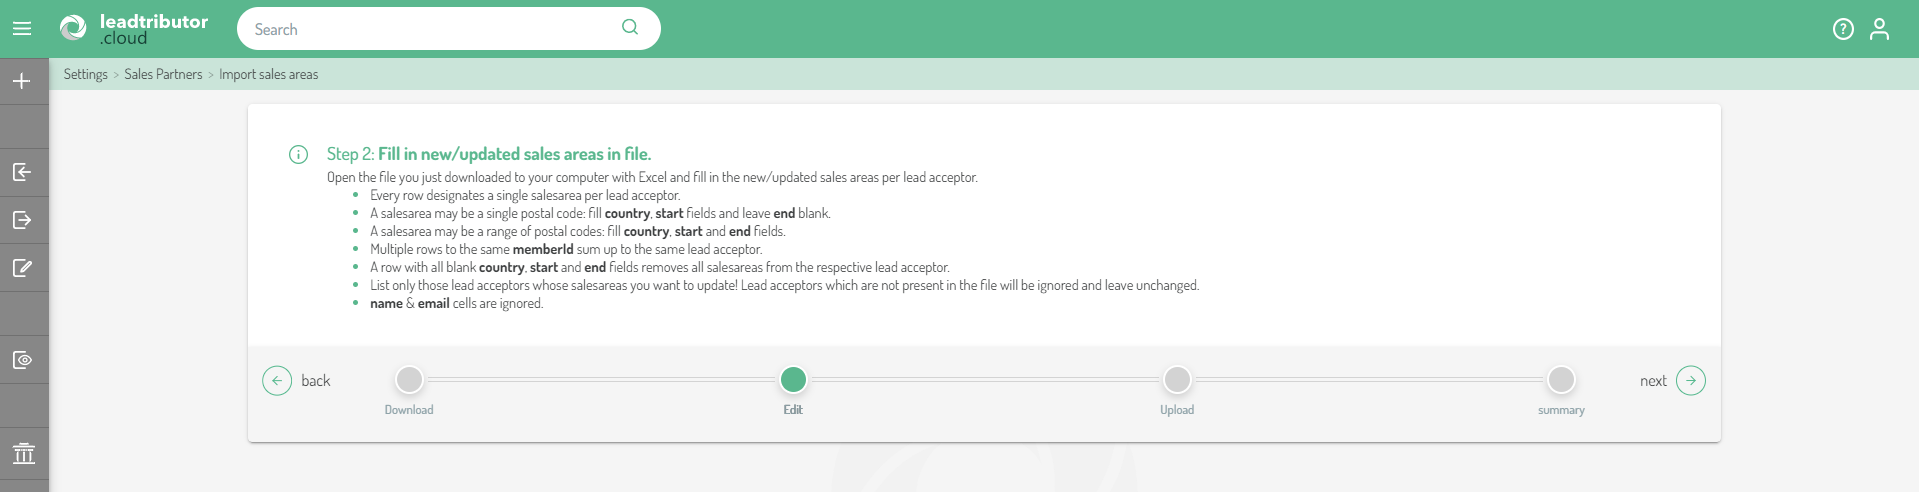
Step 2: Edit the sales areas in your downloaded file
You can now edit the downloaded Excel file and assign new postal codes to each lead acceptor or edit the current entries. You can enter individual ZIP codes or enter larger ZIP code areas by filling or modifying the Start and End columns accordingly.
Important: The column "memberId" contains the information the system needs to assign the ZIP code to the correct lead acceptor. The ID itself must not be changed, but it must be applied to each subsequent entry of the same lead acceptor.
For detailed instructions, see step 2:
Once you are done with implementing all changes, click next.
Note: If several individual postal codes have been assigned to a lead acceptor, there must be a single entry (one line) for this lead acceptor per postal code. Accordingly, you may find multiple entries per lead acceptor in your list. If you want to assign an entire postal code area to a lead acceptor (from - to), enter this accordingly under the columns "start" and "end". In this case, you will have only one entry (one line) per lead acceptor.
Step 3: Upload the updated file
After you have modified the Excel according to your wishes in accordance with the points listed in step 2, you can start the upload. To do this, click on the paper clip or in the Excel file field. A window will open and you can select the Excel file you want to import: 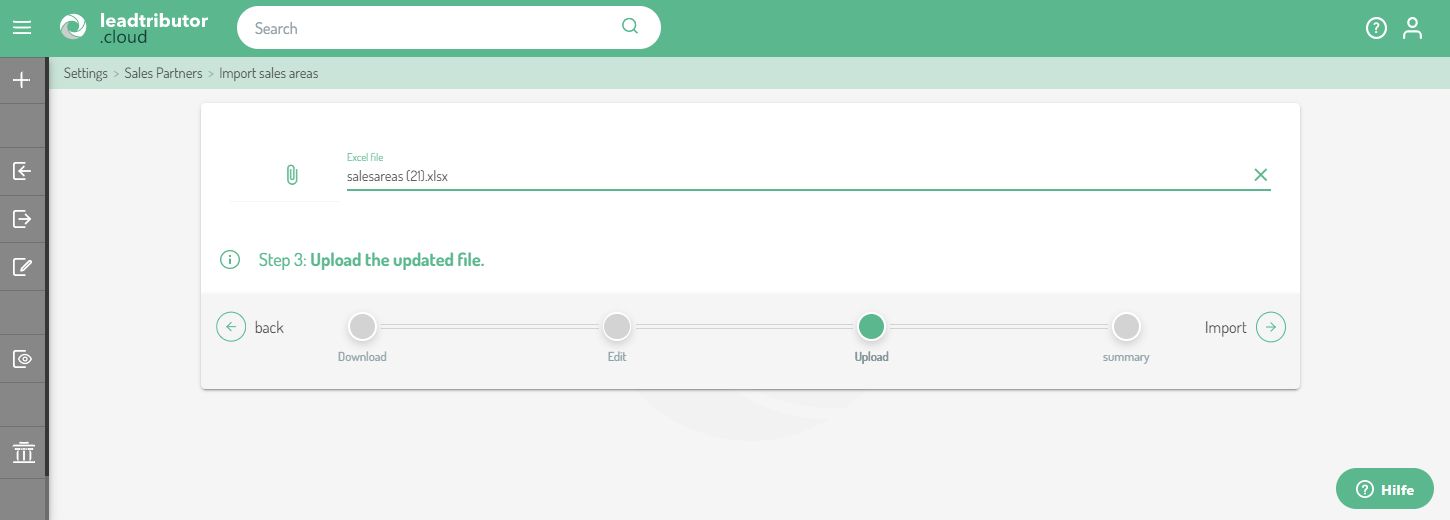
Once you are done, click Import.
If the upload was successful, you will receive the following success message. Close the editor with a click on Done: 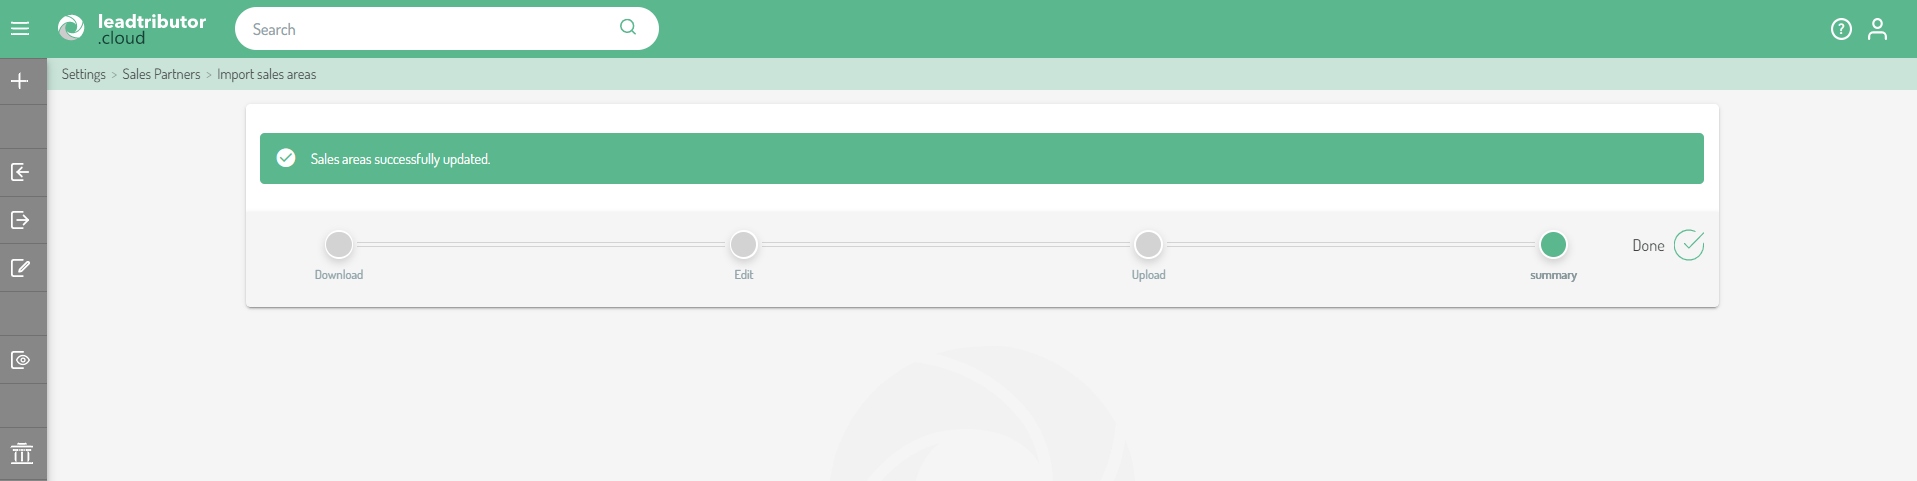
You can see which sales areas have been assigned to a partner directly in the editor. To do so, click on the three arrows highlighted in purple:
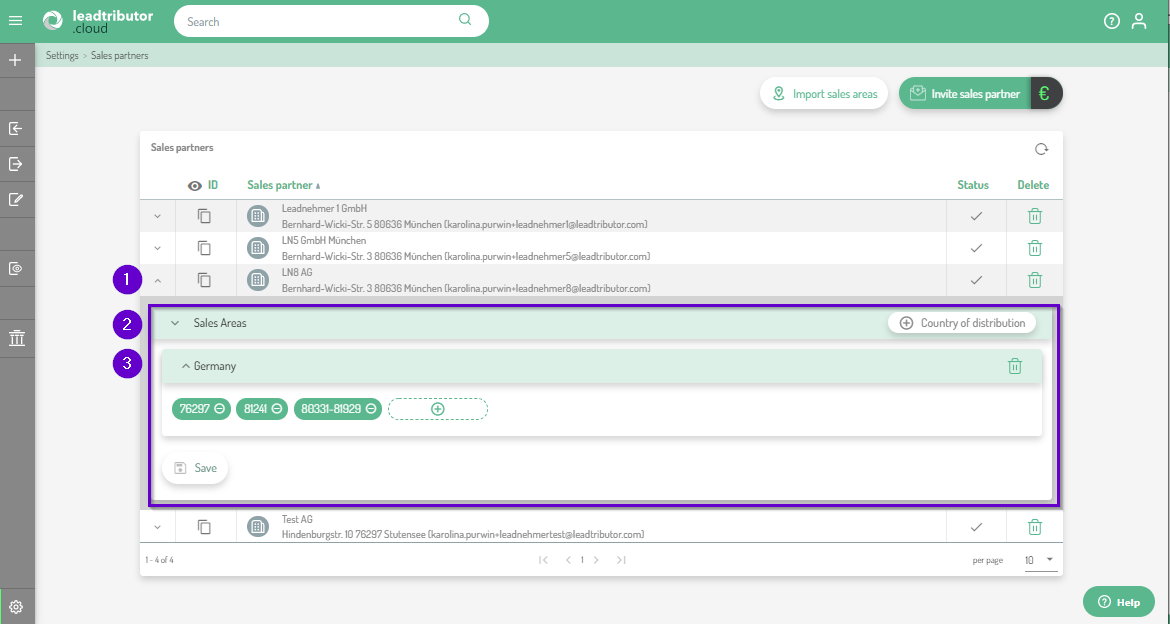
You can also make smaller changes to the sales areas via this editor. For larger changes we recommend the import function.
Comments
0 comments
Please sign in to leave a comment.